Pengertian Web Server
- Web Server adalah software (dan sekaligus komputer/server) yang berfungsi untuk melayani permintaan (request) dari client melalui protokol HTTP/HTTPS dan menampilkan halaman web di browser.
- Client biasanya adalah web browser (Chrome, Firefox, Edge, dll).
- Web Server menyimpan dan menyajikan:
- File HTML, CSS, JavaScript.
- Gambar, video, dokumen.
- Script dinamis (PHP, Python, dll) melalui integrasi dengan aplikasi lain.
🔎 Contoh nyata: Saat kamu membuka https://desain.smkn1klaten.sch.id/, browser menghubungi Web Server sekolah untuk menampilkan halaman web.
Fungsi Web Server
- Melayani Permintaan HTTP/HTTPS
Browser mengirim permintaan, server merespons dengan halaman web. - Hosting Website
Menyimpan file dan konten web agar bisa diakses oleh pengguna. - Keamanan Akses
Bisa dipasangi SSL/TLS (https) agar komunikasi terenkripsi. - Mendukung Aplikasi Web
Misalnya e-learning, e-raport, atau aplikasi berbasis PHP/MySQL.
Jenis Web Server Populer
- Apache HTTP Server
- Paling banyak digunakan.
- Open Source, berjalan di Linux/Windows.
- Mendukung PHP, MySQL.
- Nginx (Engine X)
- Ringan, cepat, cocok untuk traffic tinggi.
- Banyak dipakai oleh website besar.
- LiteSpeed
- Performa tinggi, komersial (ada versi gratis OpenLiteSpeed).
- Microsoft IIS (Internet Information Services)
- Khusus Windows Server.
Komponen Penting Web Server
- Hardware Server → komputer/server dengan jaringan internet.
- Software Server → Apache/Nginx/IIS.
- Database Server → MySQL/MariaDB/PostgreSQL.
- Bahasa Pemrograman Web → PHP, Python, Node.js.
Alur Kerja Web Server
- User mengetik alamat di browser → desain.smkn1klaten.sch.id/.
- DNS mengubah nama domain menjadi alamat IP.
- Browser mengirim request ke Web Server.
- Web Server mencari file yang diminta (misalnya index.html).
- Server mengirim balik file tersebut ke browser.
- Browser menampilkan halaman web kepada user.
Kali ini, kita akan menggunakan jenis web server Apache HTTP Server yang paling banyak digunakan oleh user. Kita akan menggunakan protocol HTTP maupun HTTPS
Langkah 1 – Instalasi Apache
Login sebagai user root dan lakukan update terlebih dahulu.
root@ns100:~# apt update
Get:1 https://security.debian.org/debian-security bookworm-security InRelease [48.0 kB]
Hit:2 https://deb.debian.org/debian bookworm InRelease
Get:3 https://deb.debian.org/debian bookworm-updates InRelease [55.4 kB]
...
Install paket Web server
root@ns100:~# apt install apache2
Reading package lists... Done
Building dependency tree... Done
Reading state information... Done
The following additional packages will be installed:
  apache2-bin apache2-data apache2-utils libapr1 libaprutil1 libaprutil1-dbd-sqlite3 libaprutil1-ldap libcurl4 liblua5.3-0
Suggested packages:
  apache2-doc apache2-suexec-pristine | apache2-suexec-custom www-browser
The following NEW packages will be installed:
  apache2 apache2-bin apache2-data apache2-utils libapr1 libaprutil1 libaprutil1-dbd-sqlite3 libaprutil1-ldap libcurl4 liblua5.3-0
0 upgraded, 10 newly installed, 0 to remove and 44 not upgraded.
Need to get 2,709 kB of archives.
....
Processing triggers for libc-bin (2.36-9+deb12u10) ...
Langkah 2 – Konfigurasi HTTP (Virtualhost)
File konfigurasi utama apache terletak di /etc/apache2/sites-available/
- 000-default.conf –> untuk konfigurasi HTTP
- default-ssl.conf –> untuk konfigurasi HTTPS
root@ns100:~# cd /etc/apache2/sites-available/

root@ns100:/etc/apache2/sites-available# ls
000-default.conf  default-ssl.conf

root@ns100:/etc/apache2/sites-available# cp 000-default.conf sekolah100.conf

root@ns100:/etc/apache2/sites-available# ls
000-default.conf  default-ssl.conf  sekolah100.conf
Buka file sekolah100.conf dengan editor teks nano
root@ns100:/etc/apache2/sites-available# nano sekolah100.conf
Tambahkan dan sesuaikan script berikut ini:
<VirtualHost *:80>

        ...
        ServerName sekolah100.sch.id
        ServerAlias www.sekolah100.sch.id
        ServerAdmin haryadi@sekolah100.sch.id
        DocumentRoot /var/www/html
        ...
        ErrorLog ${APACHE_LOG_DIR}/error.log
        CustomLog ${APACHE_LOG_DIR}/access.log combined

</VirtualHost>
Simpan perubahan dan keluar dari editor nano
Pindah ke root dokumen apache yaitu ke direktori /var/www/html
root@ns100:/etc/apache2/sites-available# cd /var/www/html/

root@ns100:/var/www/html# ls
index.html

root@ns100:/var/www/html# cp index.html index.html.asli

root@ns100:/var/www/html# nano index.html
Membuat folder share, read dan private serta mengubah permision-nya
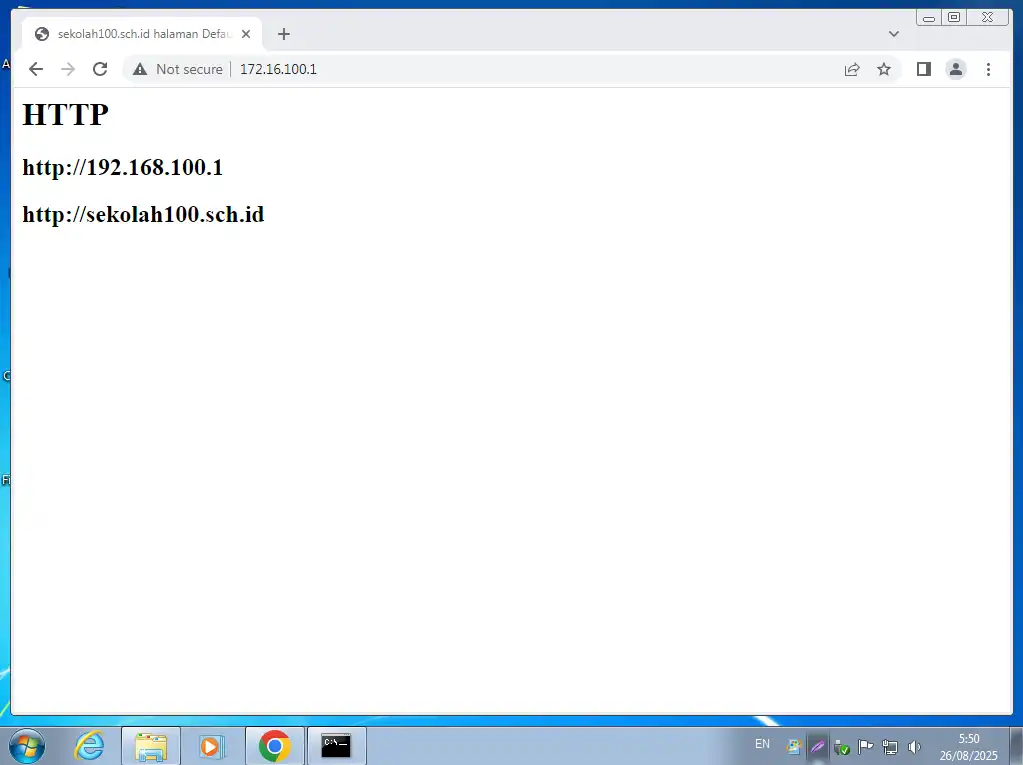
<html>
<head>
<title>sekolah100.sch.id halaman Default</title>
</head>
<body>
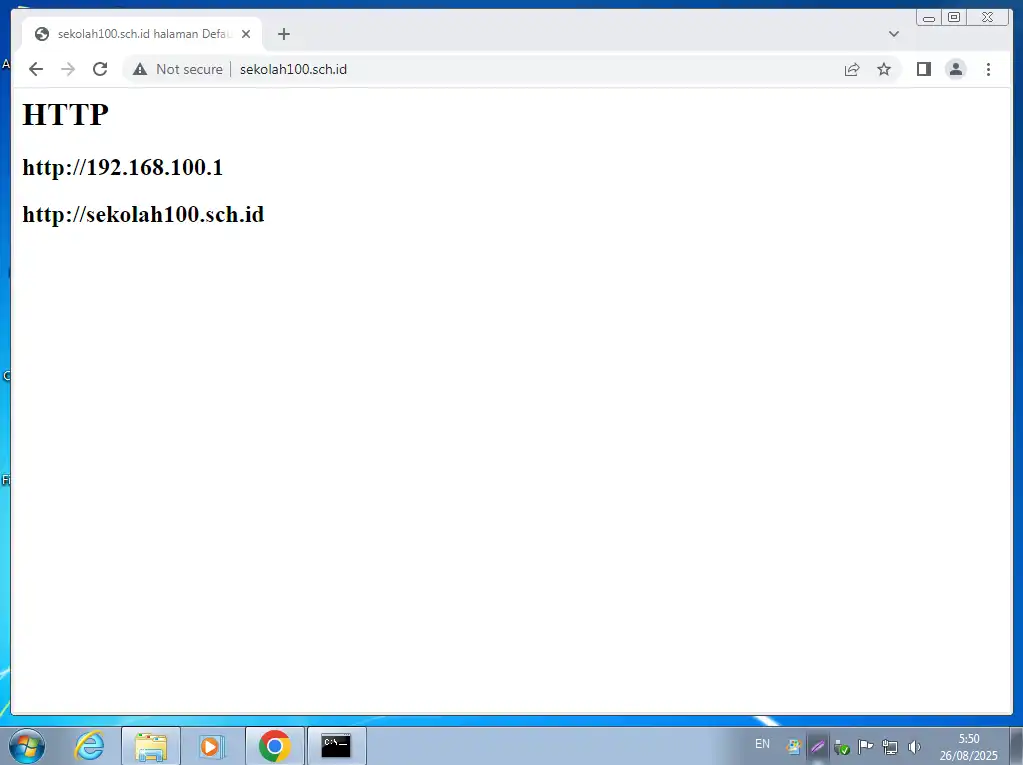
<p><h1>HTTP</h1></p>
<p><h2>http://192.168.100.1</h2></p>
<p><h2>http://sekolah100.sch.id</h2></p>
</body>
</html>
Disable default virtualhost
root@ns100:/var/www/html# a2dissite 000-default.conf
Site 000-default disabled.
To activate the new configuration, you need to run:
  systemctl reload apache2
Enable sekolah100.conf virtualhost
root@ns100:/var/www/html# a2ensite sekolah100.conf
Enabling site sekolah100.
To activate the new configuration, you need to run:
  systemctl reload apache2
Restart layanan apache
root@ns100:/var/www/html# /etc/init.d/apache2 restart
Restarting apache2 (via systemctl): apache2.service.
Langkah 3 – Pengujian
Pengujian Web server protokol HTTP
Buka browser dan bersihkan cache-nya terlebih dahulu dengan menekan tombol kombnasi Ctrl+F5. Buka url dengan mengetikkan IP Address: http://172.16.100.1
Buka url dengan mengetikkan alamat domain: http://sekolah100.sch.id
Langkah 4 – Konfigurasi HTTPS
Pindah ke direktori private, lalu generete key
root@ns100:/var/www/html# cd /etc/ssl/private/
root@ns100:/etc/ssl/private# openssl genrsa -aes128 -out sekolah100.key 2048
Enter PEM pass phrase: root123
Verifying - Enter PEM pass phrase: root123
root@ns100:/etc/ssl/private# ls
sekolah100.key  ssl-cert-snakeoil.key  vsftpd.pem
root@ns100:/etc/ssl/private# openssl rsa -in sekolah100.key -out sekolah100.key
Enter pass phrase for sekolah100.key: root123
writing RSA key
root@ns100:/etc/ssl/private# openssl req -new -days 365 -key sekolah100.key -out sekolah100.csr
Ignoring -days without -x509; not generating a certificate
You are about to be asked to enter information that will be incorporated
into your certificate request.
What you are about to enter is what is called a Distinguished Name or a DN.
There are quite a few fields but you can leave some blank
For some fields there will be a default value,
If you enter '.', the field will be left blank.
-----
Country Name (2 letter code) [AU]:ID
State or Province Name (full name) [Some-State]:JAWA TENGAH
Locality Name (eg, city) []:KLATEN
Organization Name (eg, company) [Internet Widgits Pty Ltd]:SMKN 1 KLATEN
Organizational Unit Name (eg, section) []:TJKT
Common Name (e.g. server FQDN or YOUR name) []:sekolah100.sch.id
Email Address []:hyd@sekolah100.sch.id
Please enter the following 'extra' attributes
to be sent with your certificate request
A challenge password []: Tekan Enter
An optional company name []: Tekan Enter
root@ns100:/etc/ssl/private# openssl x509 -in sekolah100.csr -out sekolah100.crt -req -signkey sekolah100.key -days 365
Certificate request self-signature ok
subject=C = ID, ST = JAWA TENGAH, L = KLATEN, O = SMKN 1 KLATEN, OU = TJKT, CN = sekolah100.sch.id, emailAddress = hyd@sekolah100.sch.id
root@ns100:/etc/ssl/private# chmod 400 sekolah100.*

root@ns100:/etc/ssl/private# cd /etc/apache2/sites-available/

root@ns100:/etc/apache2/sites-available# ls
000-default.conf  default-ssl.conf  sekolah100.conf

root@ns100:/etc/apache2/sites-available# cp default-ssl.conf sekolah100-ssl.conf
root@ns100:/etc/apache2/sites-available# nano sekolah100-ssl.conf
<VirtualHost *:443>
ServerAdmin hyd@sekolah100.sch.id
ServerName sekolah100.sch.id
ServerAlias www.sekolah100.sch.id
DocumentRoot /var/www/html/https
...
ErrorLog ${APACHE_LOG_DIR}/error.log
CustomLog ${APACHE_LOG_DIR}/access.log combined
...
SSLEngine on
...
# SSLCertificateFile directive is needed.
#SSLCertificateFile /etc/ssl/certs/ssl-cert-snakeoil.pem
#SSLCertificateKeyFile /etc/ssl/private/ssl-cert-snakeoil.key

SSLCertificateFile /etc/ssl/private/sekolah100.crt
SSLCertificateKeyFile /etc/ssl/private/sekolah100.key
...

<FilesMatch ".(?:cgi|shtml|phtml|php)$">
         SSLOptions +StdEnvVars
</FilesMatch>
<Directory /usr/lib/cgi-bin>
         SSLOptions +StdEnvVars
</Directory>

</VirtualHost>
root@ns100:/etc/apache2/sites-available# mkdir /var/www/html/https
root@ns100:/etc/apache2/sites-available# nano /var/www/html/https/index.html
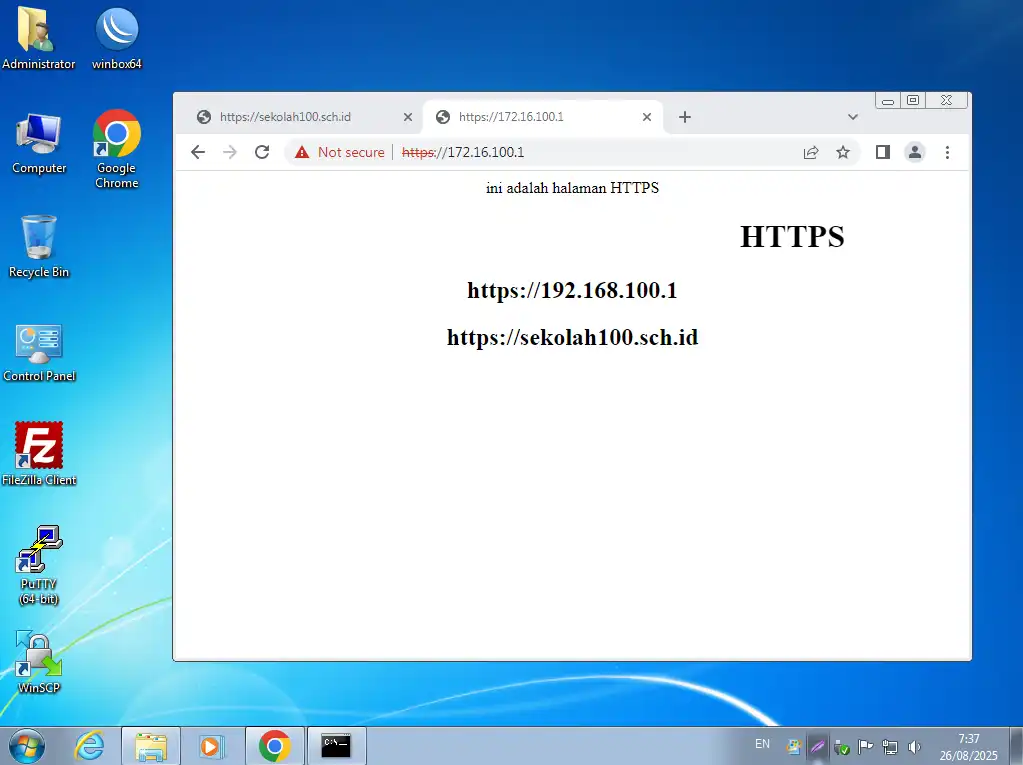
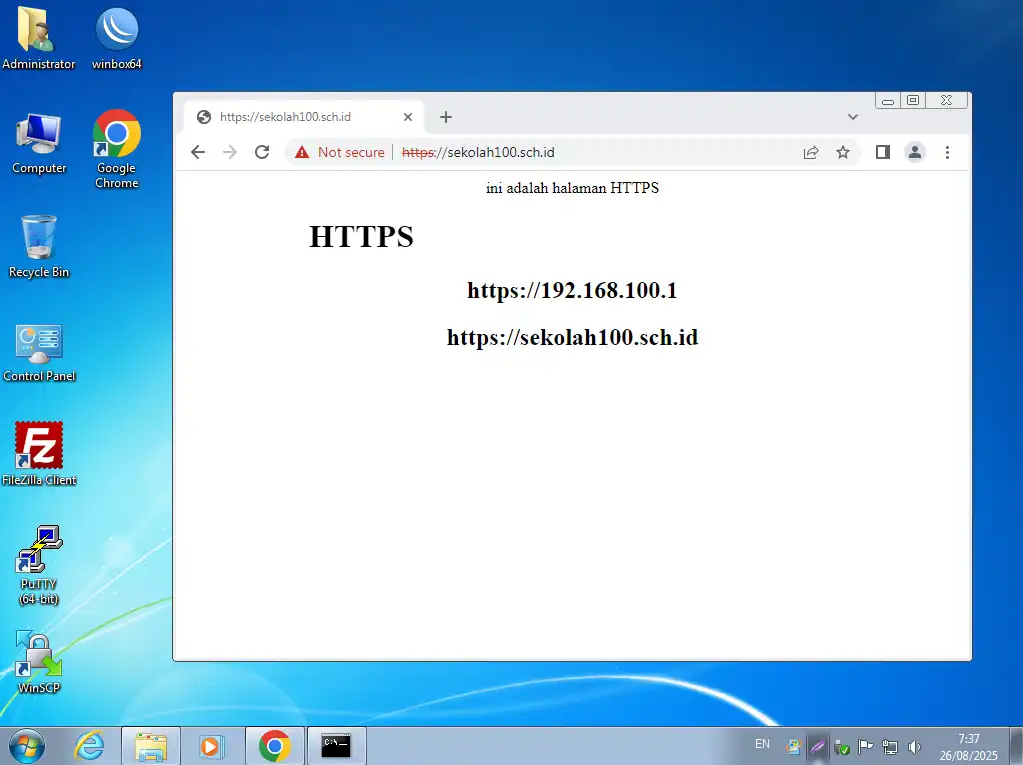
<div align="center">
    <p>ini adalah halaman HTTPS</p>
    <p><h1><marquee>HTTPS</marquee></h1></p>
    <p><h2>https://192.168.100.1</h2></p>
    <p><h2>https://sekolah100.sch.id</h2></p>
</div>
root@ns100:/etc/apache2/sites-available# a2enmod ssl
Considering dependency setenvif for ssl:
Module setenvif already enabled
Considering dependency mime for ssl:
Module mime already enabled
...
To activate the new configuration, you need to run:
  systemctl restart apache2

root@ns100:/etc/apache2/sites-available# a2ensite sekolah100-ssl.conf
Enabling site sekolah100-ssl.
To activate the new configuration, you need to run:
  systemctl reload apache2

root@ns100:/etc/apache2/sites-available# /etc/init.d/apache2 restart
Restarting apache2 (via systemctl): apache2.service.
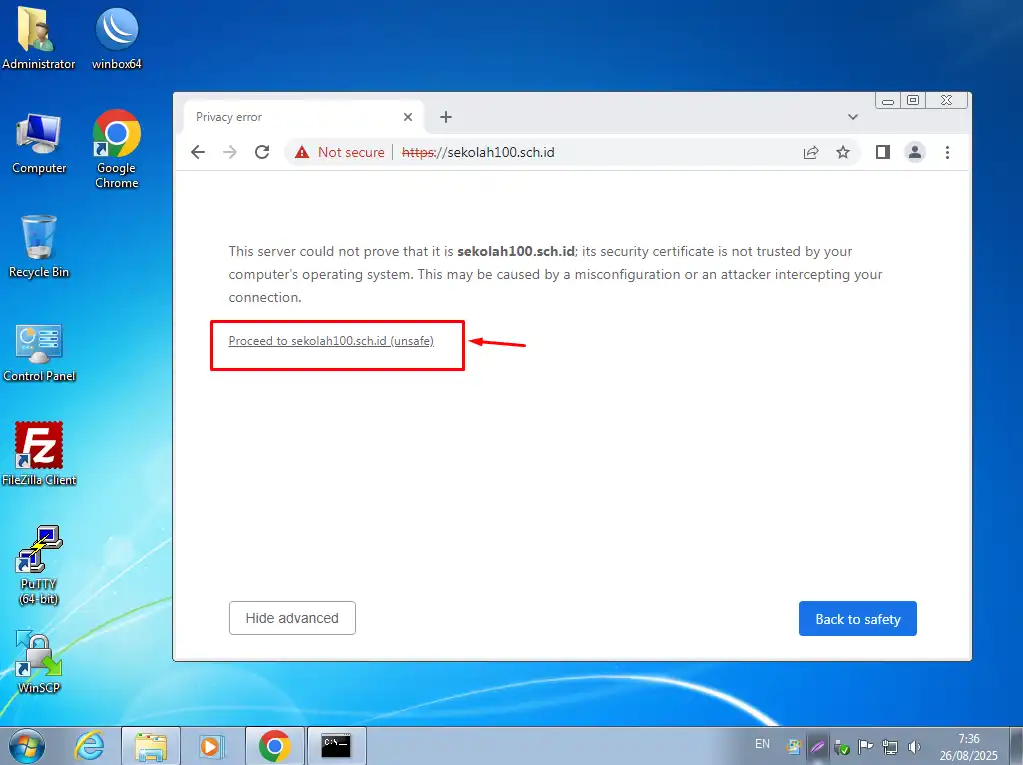
Pengujian Web Server (HTTPS)
- Ketik url https://sekolah100.sch.id
- Klik tombol Advanced
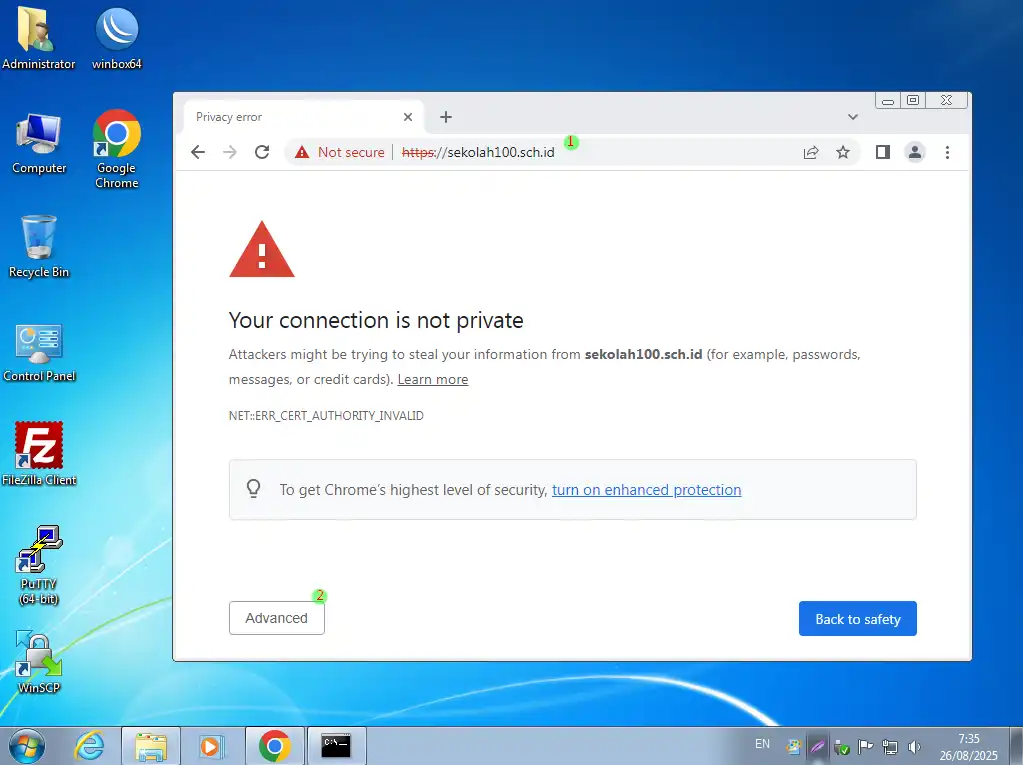
Klik Proceed ….
Akses https menggunakan nama domain berhasil
Akses menggunakan alamat IP Address